Every wedding photographer knows that one of the most difficult things about photographing weddings is the constantly changing light. In a typical wedding you will most likely experience the full spectrum of lighting scenarios, from full on sunshine, to darkly lit hotel rooms, and probably even some ugly fluorescent church lighting. If you want to […]
Every wedding photographer knows that one of the most difficult things about photographing weddings is the constantly changing light. In a typical wedding you will most likely experience the full spectrum of lighting scenarios, from full on sunshine, to darkly lit hotel rooms, and probably even some ugly fluorescent church lighting. If you want to call yourself a professional photographer you have to be able to shoot in all of these while getting consistent results. And that is no easy task, especially for someone starting out. So today we are going to focus on one of the most difficult part of weddings to shoot- the reception. When we were starting out, developing our style, and learning how to handle light in all of these situations, I can remember being at the stage of our learning when we were doing all of the google searches and watching all of the “How to use off camera flash during receptions” youtube videos, probably very similarly to what you are doing now. So we thought we would provide another resource to you which explains the lighting set up that we have developed throughout our six years of shooting weddings that gives us consistent results again and again, regardless of the venue. We believe in helping newer photographers. So if that’s you, we want to help you get your feet under you a little better. And hopefully this will give you a little bit more confidence for one of the most difficult parts of weddings to shoot.
Now for all of our lighting set-ups that we do, we use only 2-3 flashes. We set two flashes on light stands and one flash mounted on each of our cameras. Being Canon users, we use Canon’s 600EX-RT’s. Let me just pause and say that I love these flashes. Seriously. Before Canon came out with them we used the 580ex-ii’s and pocket wizards. We had mixed success with the pocket wizards and just really didn’t like messing with them all of the time. If you are trying to figure out what flashes to get and you use Canon, I would HEAVILY consider spending the extra money and getting the 600’s. It’s so nice not having to worry whether the flashes are going to fire when the husband dips his wife after the first dance and you only have a millisecond to take a picture of it. The built-in remote feature makes controlling slave flashes so easy and we have never had a flash misfire once. (Unless you count dead batteries). Unfortunately for those of you who shoot with Nikon, you will have to stick with the pocket wizards because as far as I know Nikon has not come out with their own flash with this same built-in remote technology. Anyway, when we head out to a reception we take two light stands (for the 2 slave flashes) and flashes for our own cameras. And with just that, we can light up any venue, regardless if its outside, inside, or whatever. If you are interested in getting your own Canon flashes, you can purchase some here from B&H Photo or Roberts Camera.
Here is a diagram of what we do for lighting up the main table for when dad’s giving his “welcome to the party everyone, and I’m so proud of my daughter” speech and the best man and maid of honor are giving their speeches. You will have to excuse our rudimentary drawings, but they will do the trick.
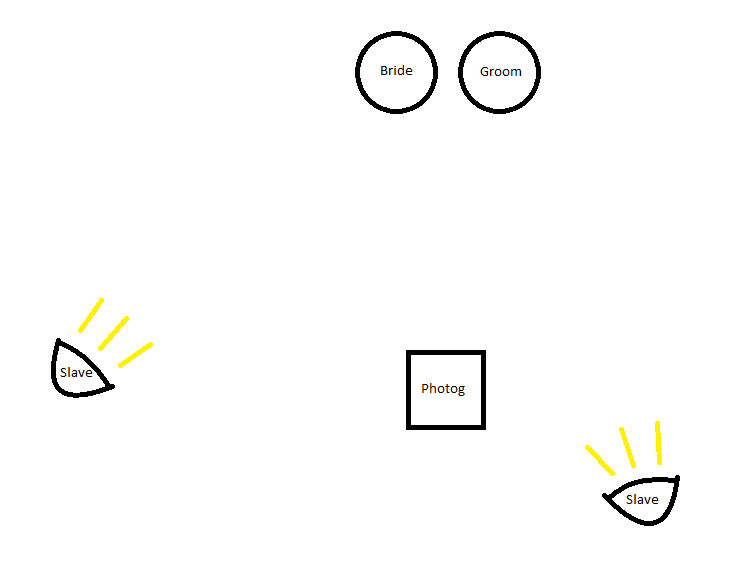
I know what you are thinking, “Wow, that’s not very complex.” Here’s the deal, you don’t want it to be overly complex. Simple is often better. Especially when we are talking about the realm of wedding photography. It’s not uncommon to roll in on the party bus after doing bridal party and bridal photos around town and realize you only have 2 minutes to get all of the lights set up before the DJ starts announcing the bridal party. Not only do you not want to have to carry that stuff around everywhere, but you need to be able to set up quickly and consistently every time.
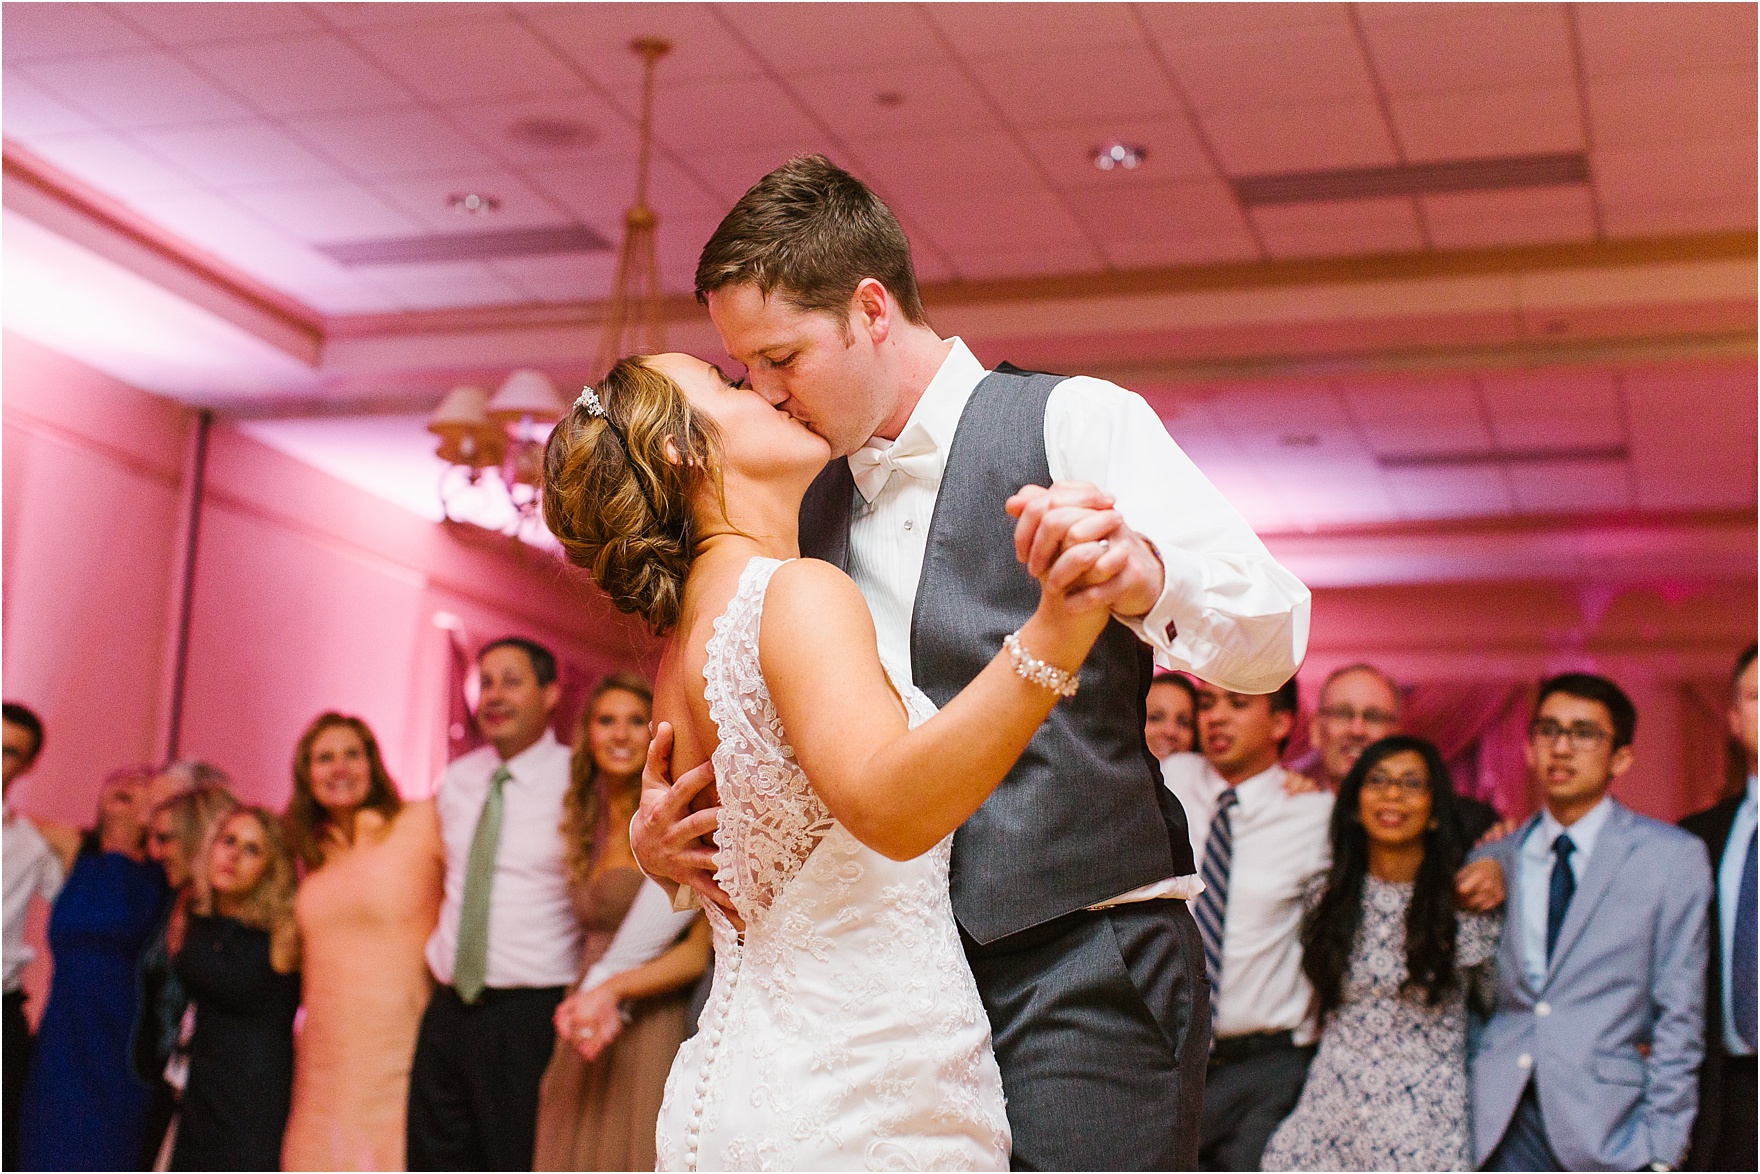
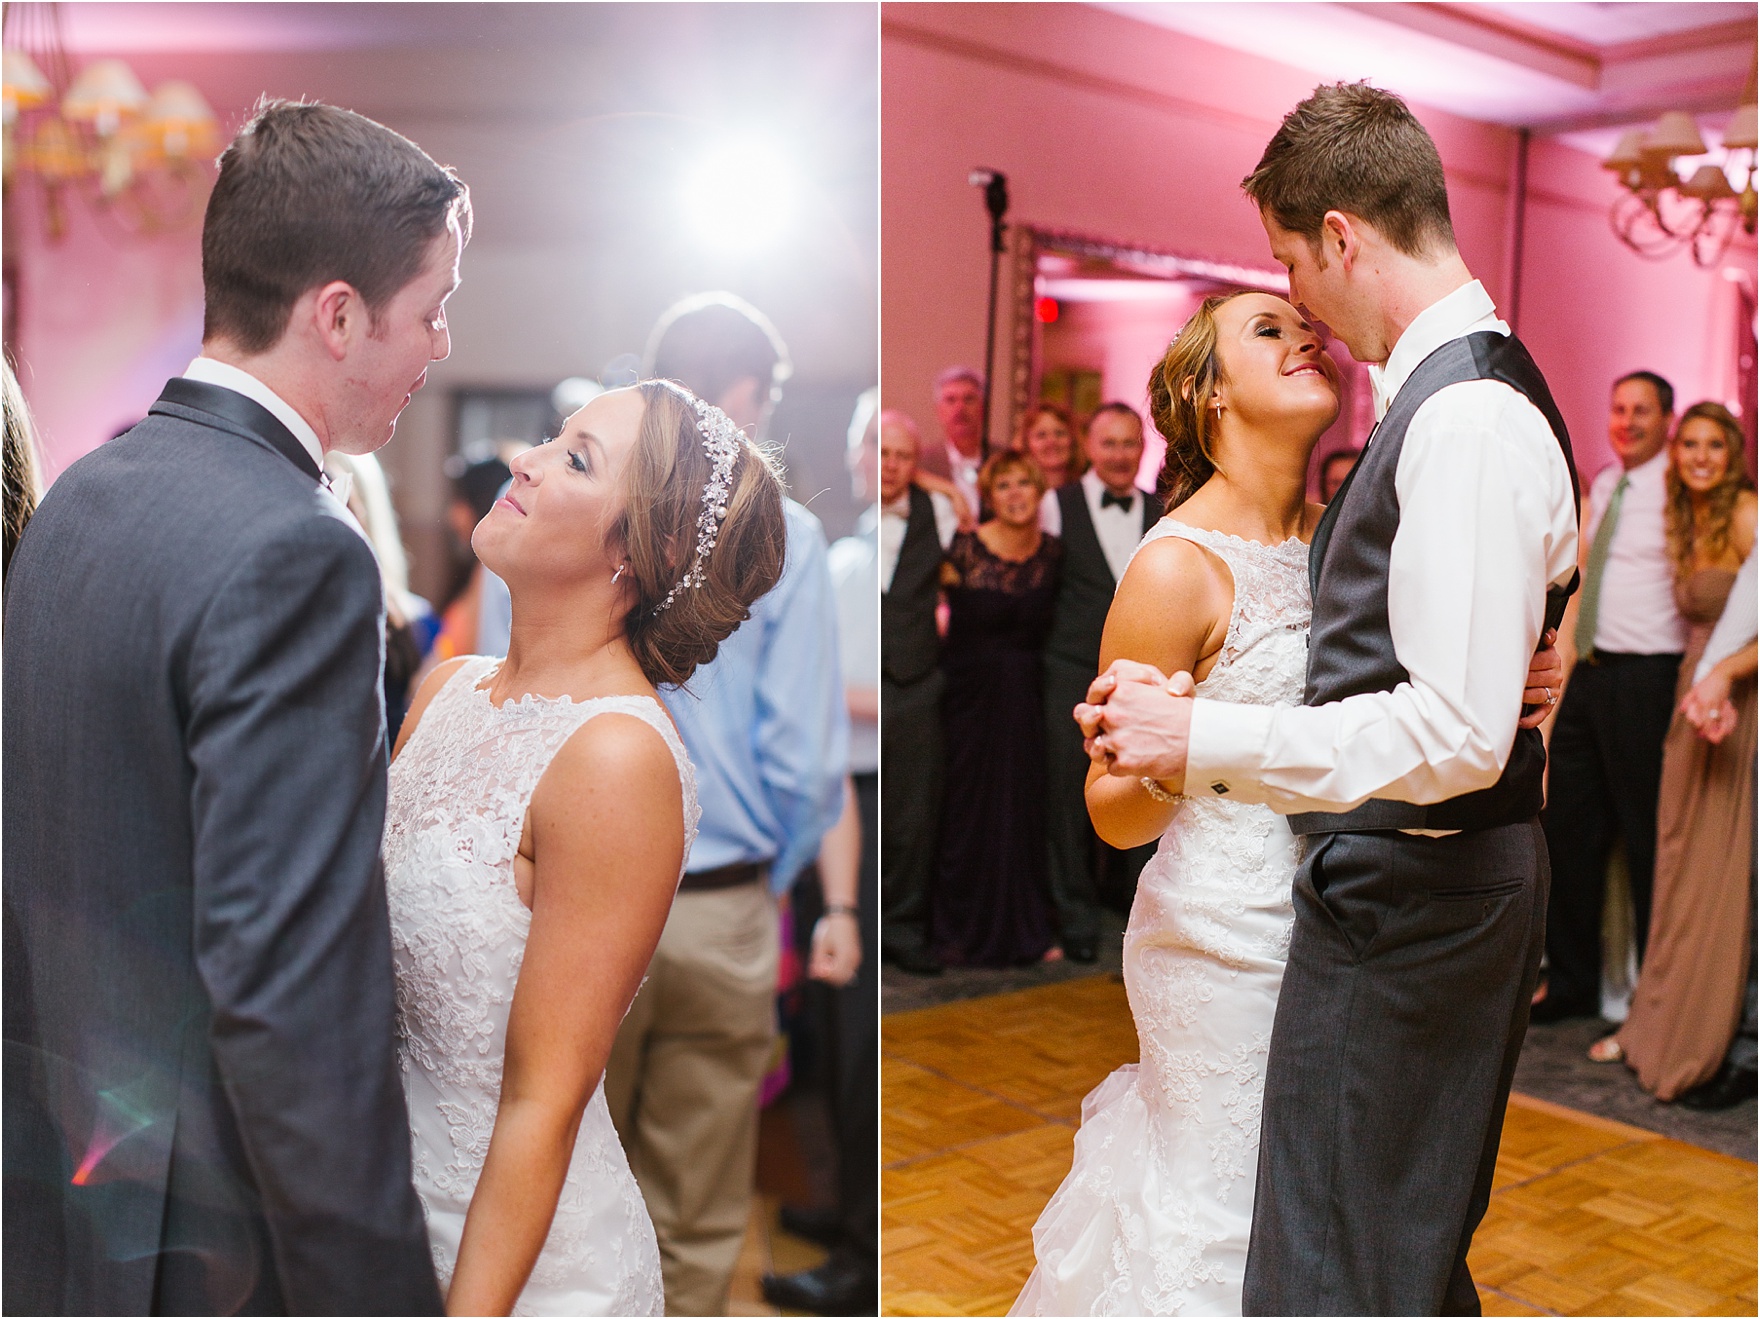
So as you can see from the diagram we set up one flash a little to one side of center as our main lighting source and then set the second light on the opposite side as a fill light to dispel any cross shadows and to throw a bit of light on the hair. We point both of the slave flashes on the stands directly at the wedding party. The reason we do this is because no matter what, we know we are going to have the same results. Oftentimes you can’t rely on a good bounce flash because you can have all sorts of different ceilings. Sometimes you may not even have a ceiling to rely on at all! So we started using this direct flash technique after many attempts at fighting through bounce flash problems and have never looked back. Now obviously you are going to have put a little distance between the flashes and your subjects and dial down the flash power since we are using direct flash but this also saves on another problem that you can run into with bounce flash and that is quick battery drain. We have never had to change batteries mid-reception because these methods usually involve dialing the flashes down to 1/32nd, 1/64th, or even 1/128th. Rarely we will increase the power if its super dark during the dancing, but that’s not very often. As for the flash on our cameras, we don’t always use it, but when we do, we do use it as a bounce flash because oftentimes we are much closer than the slave flashes and the direct flash would really blow out the picture.
I also want to mention the height of the light stands. It is very important that you put those slave flashes way up there. For two reasons. 1) It is more natural looking because we are used to seeing the effect of light coming from above. And the more natural the better. 2) We want to avoid any shadows getting thrown on our subjects of people walking in front of the flashes. Especially when its dance time, if your flashes aren’t high enough, you might as well not even be using them with the amount of shadows you are going to get. Lifting the flashes to 8 or 9 feet helps give you a more natural looking light and eliminates most of the shadows you will have.
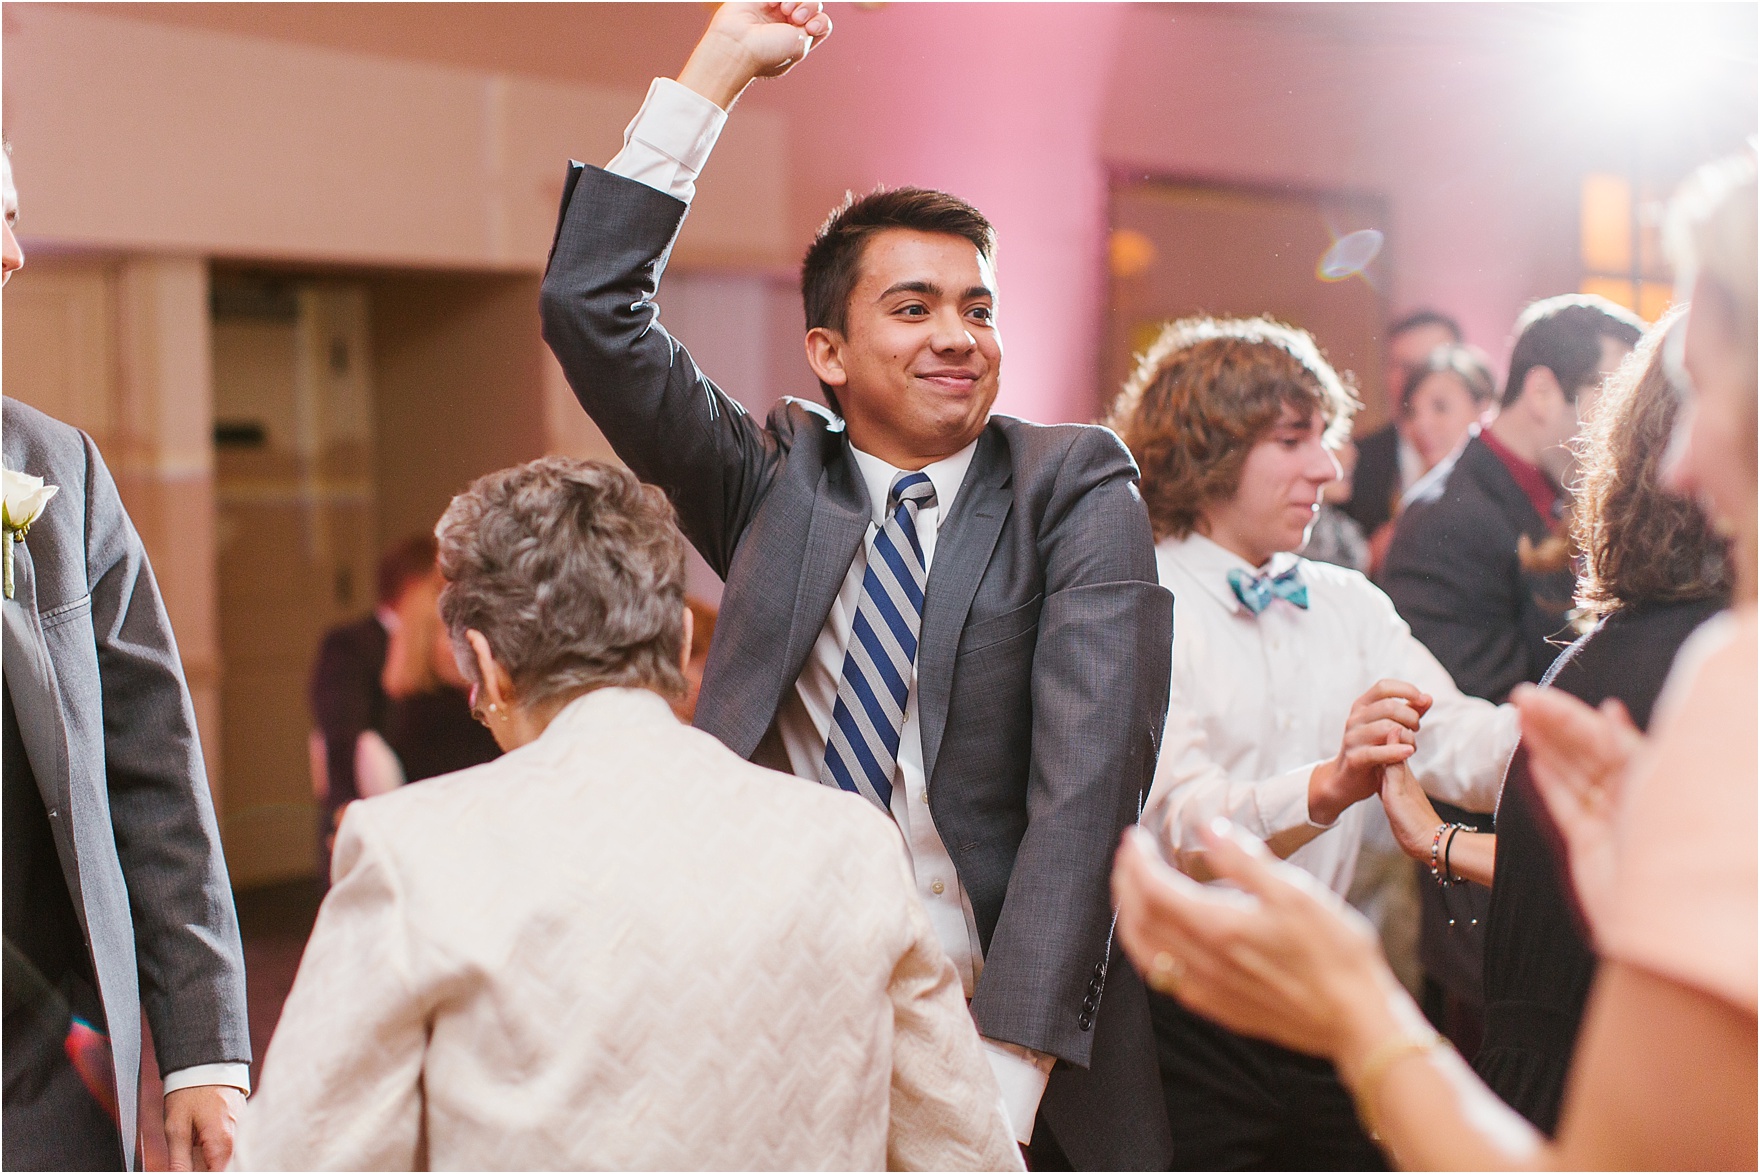
Now on to the dance floor!
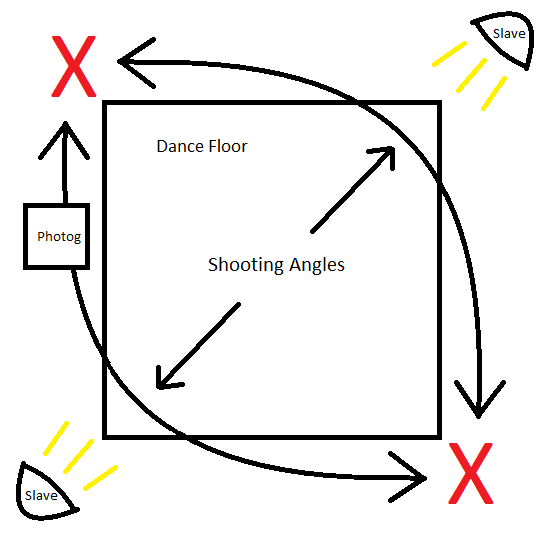
As we show in the diagram we usually stick our two light stands catty-corner from one another, pointing towards the middle of the floor. By doing this, it allows us to move almost anywhere on the dance floor and get a nice even light. The only trouble you run into is when you stand directly at the corners without the light stands because you don’t have any direct light here. But if you wanted to, you could put up a third light and solve that problem. We just choose not to because it has never been an issue for us. Another reason we love this set up is because from many angles we can get a nice back light or light flare that really gives the photos a nice party feel to them.
As one final word of caution, try to keep the light stands as conspicuous as possible. Try not to put them in main walkways or busy areas because it would really stink to have a stray dancer send one of your flashes crashing to the ground, or worse, to have grandma Betty trip over one of your stands. So just be smart and use your best judgment.
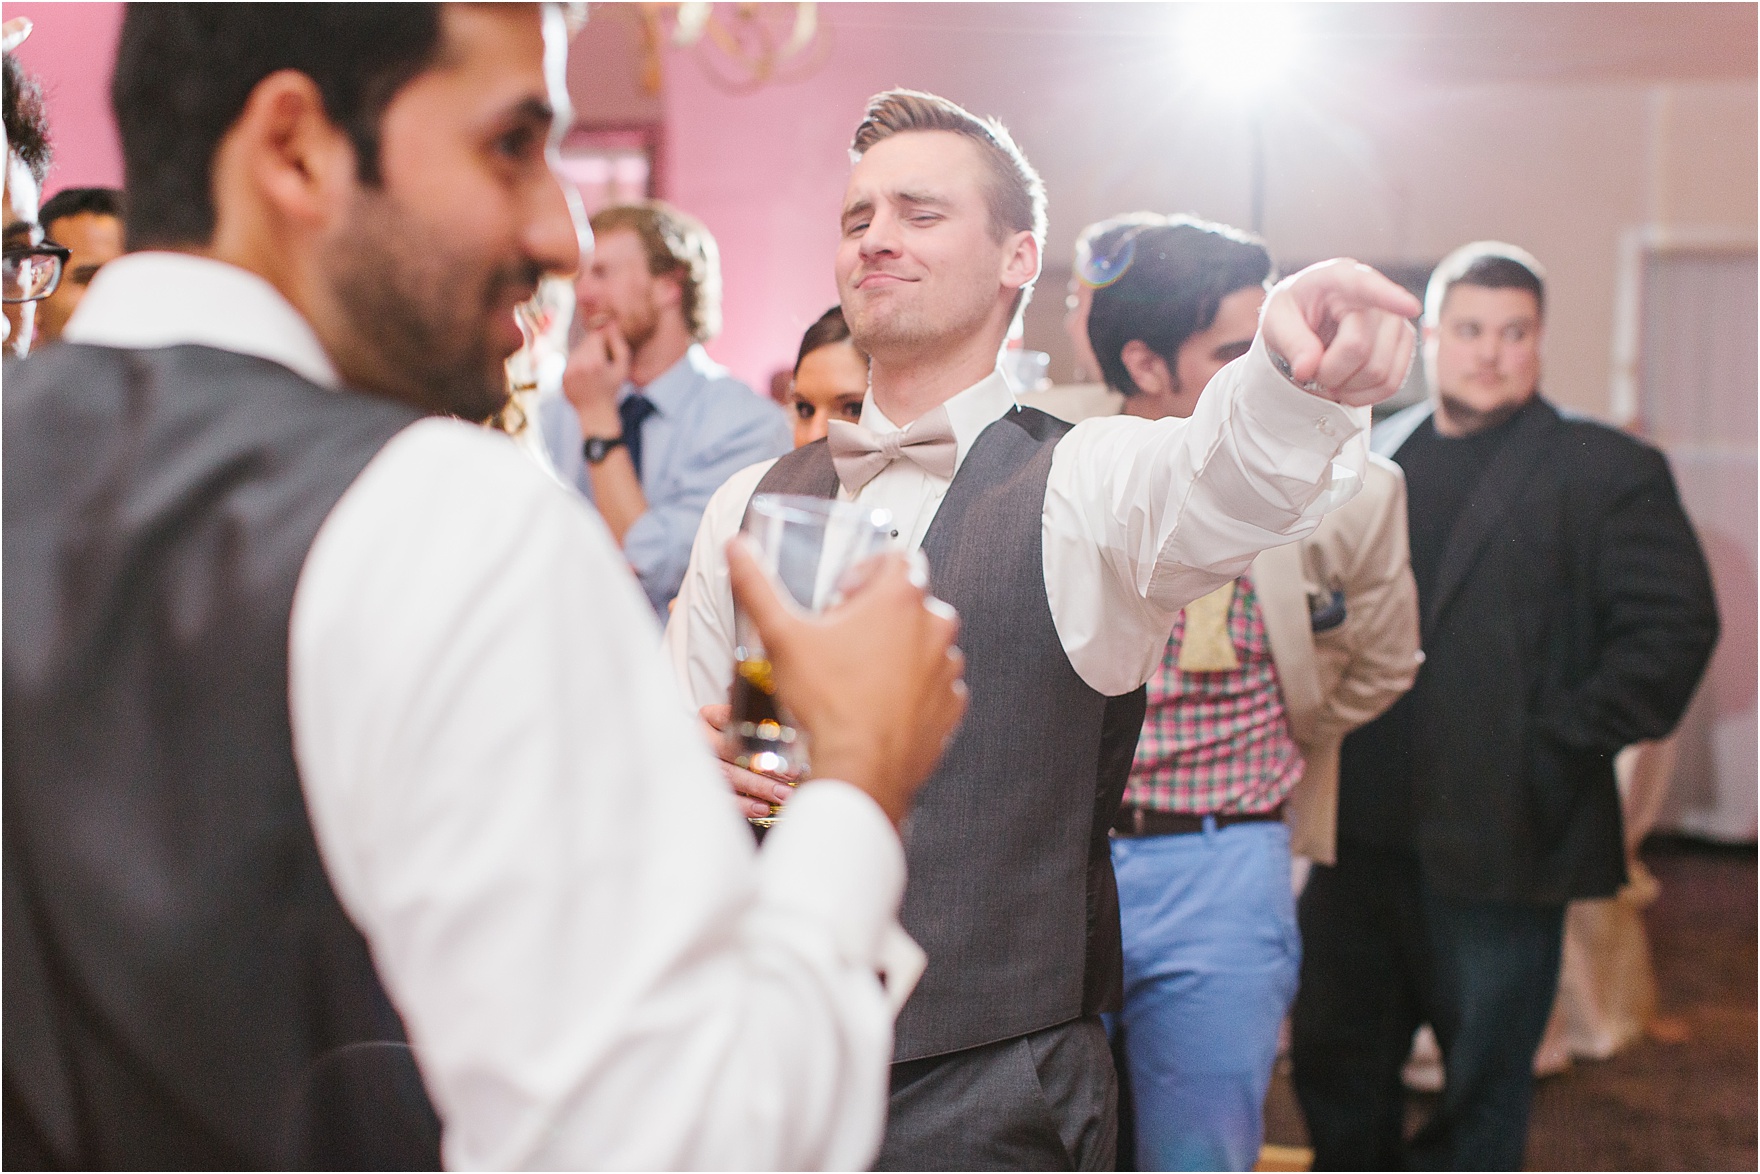
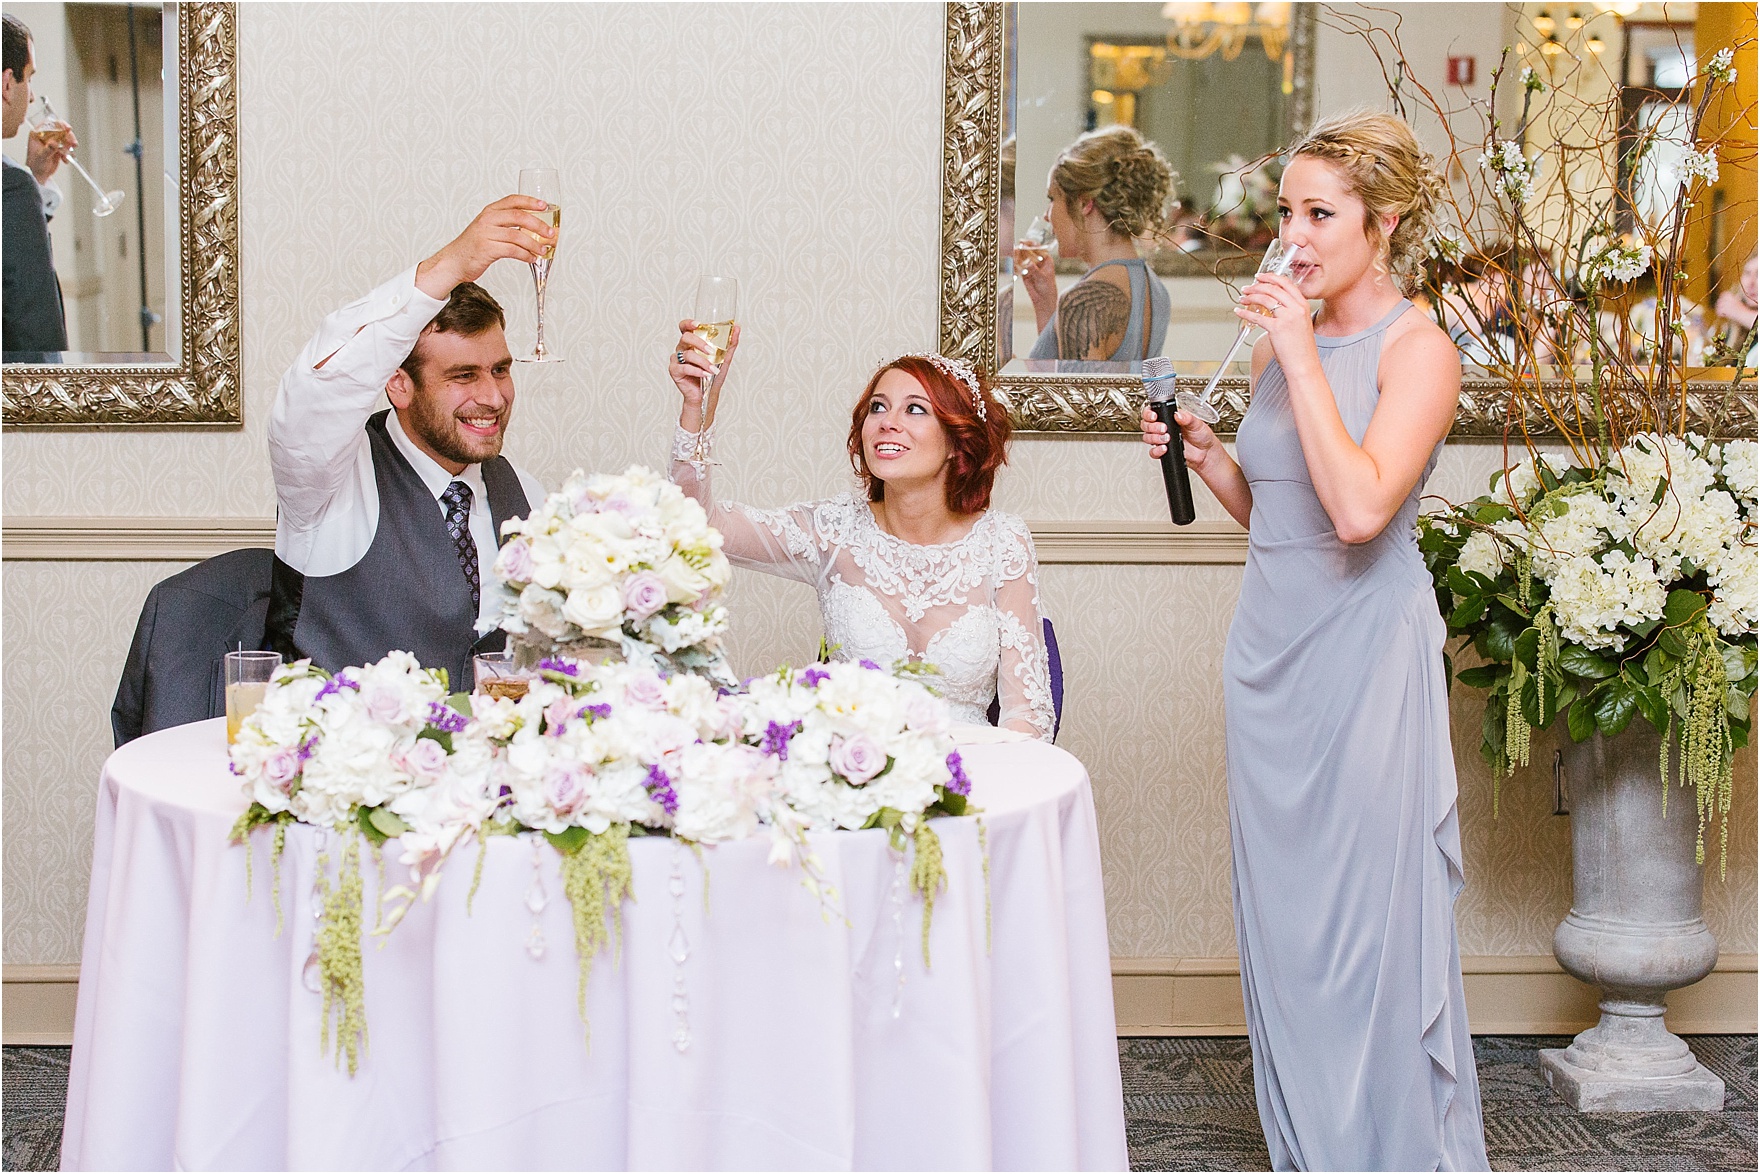
Hopefully this has been a good learning experience for you. And we hope this will help you develop your own reception lighting techniques and you won’t have to spend anymore time on the “How to use off camera flash during receptions” videos. We’ve included a few photos of recent weddings where we used these techniques to show you what it looks like. Good luck with your lighting!!
~Micala and Jordan McClain are Indianapolis wedding photographers of 604 Studios, a husband and wife duo!~

June 7th, 2018 at 5:27 pm
Thank you so much for this information. Very clearly stated and informative. Will put it to practice! 😊